Pages

Sunday, September 29, 2013

Handmade Fall and Thanksgiving Items

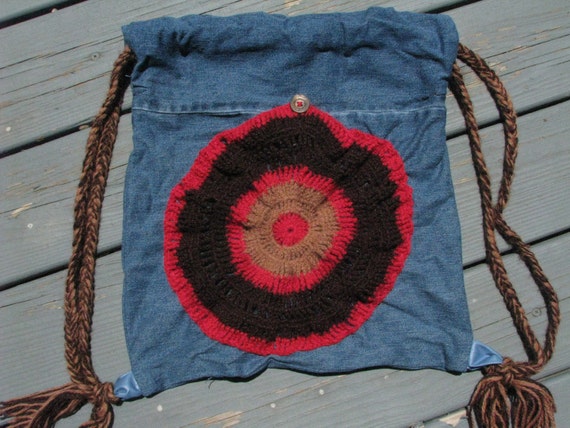
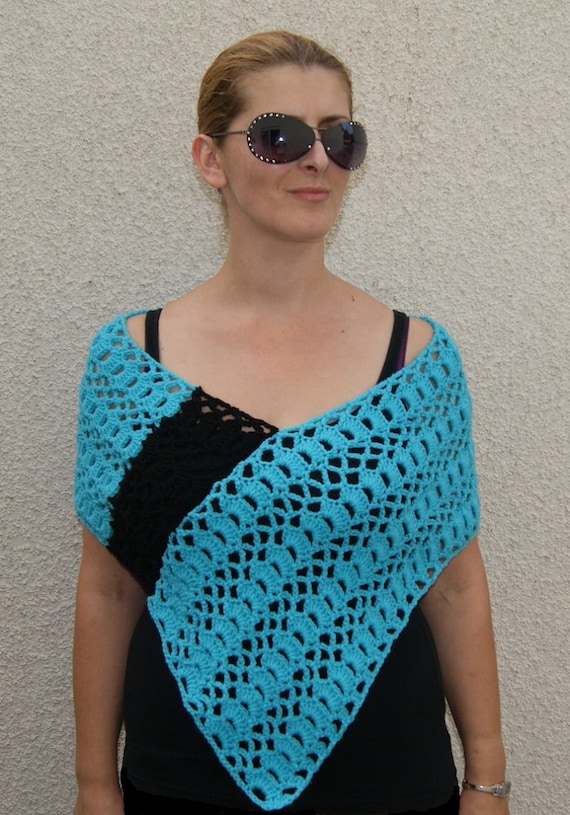
Handmade / crochet poncho with dramatic fringe and giant pom poms stark white and newspaper print combo, this piece will surely make a statement!
* open stitch, picot stitch detailing
* one size
* wool
* in stock and ready to ship
* usps priority (see shop policies)
* machine wash cold / gentle cycle and lay flat to dry
This poncho is an original design and truly a labor of love, it is crocheted with an open stitch with small picot detailing that gives a heart-like shape to the pattern! Sweet, feminine, and bold all at the same time. Great dramatic fringe for dancing and movement, gigantic pom pom drawstring for the playful at heart. This item is currently in stock and ready to ship just go to WhatsOliviaWearing.
The weather is slowly thinking about turning to the fall and the colors in the trees are starting to creep onto a few leaves. While it might not yet be the temperature for jackets and hand-knitted scarfs it is starting to be the time to dig these items out, and to buy more if the moths have put holes in them. On top of that you also have Thanksgiving and all its relative holidays like Easter and Halloween to prepare for. This means preparing for all those crazy relatives and finding a way to feed them. Perhaps you are suddenly in need of some new cooking utensils or even just a new blanket for the guest room.
Well here are a few handmade items that can help you prepare for the rush of cold and the desire to keep warm with a handmade blanket and hot chocolate. These were all handmade by people on etsy.com who love to make and sell these items for your winter enjoyment.

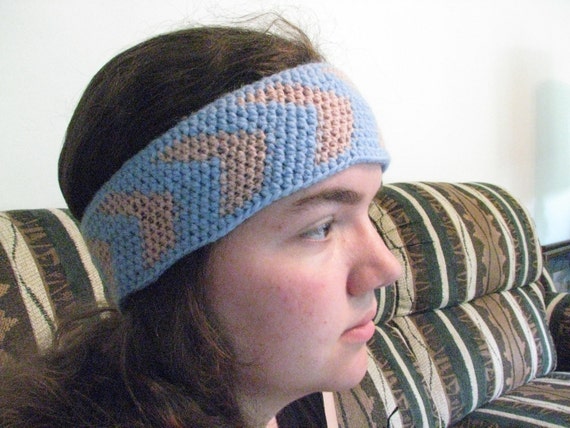
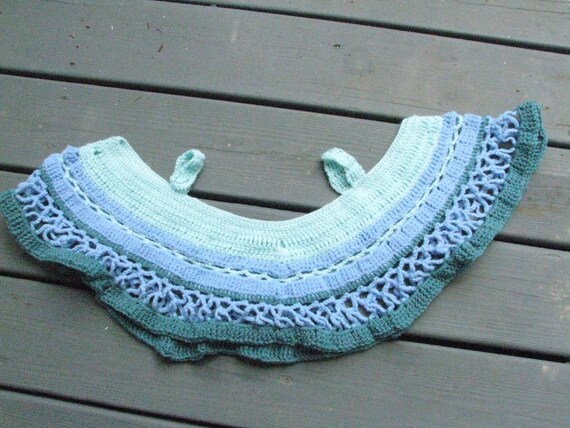
This headband is the perfect accessory for Spring and Summer , Fall and Winter ! The headband was hand crocheted from soft cotton yarn which makes it super easy to care for.
Comes in the colors below. If you are interested in it go to ARTcrochet's store on etsy.com
-white
-light yellow
-canary yellow
-mint green
-green
-beige
-salmon
-orange
-red
-hot pink
-denim blue
-turquoise blue
-lavender
-purple
-lilac pink

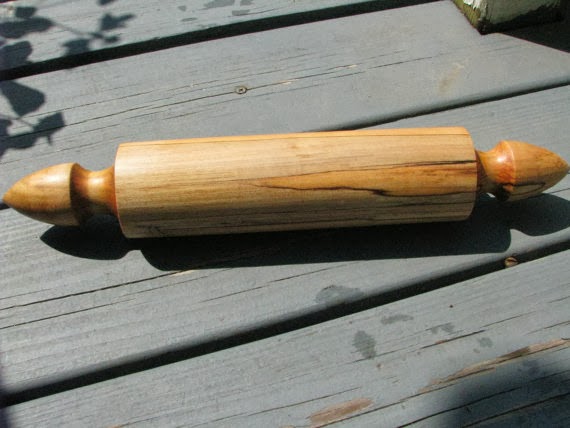
Here is a beautiful hand turned rolling pin. It was made out of maple and would be a wonderful addition to any kitchen either for cooking food or for keeping the husband and kids in check. It is about 14 inches long.
Visit Dreamcrafter's store on etsy.com for more information.

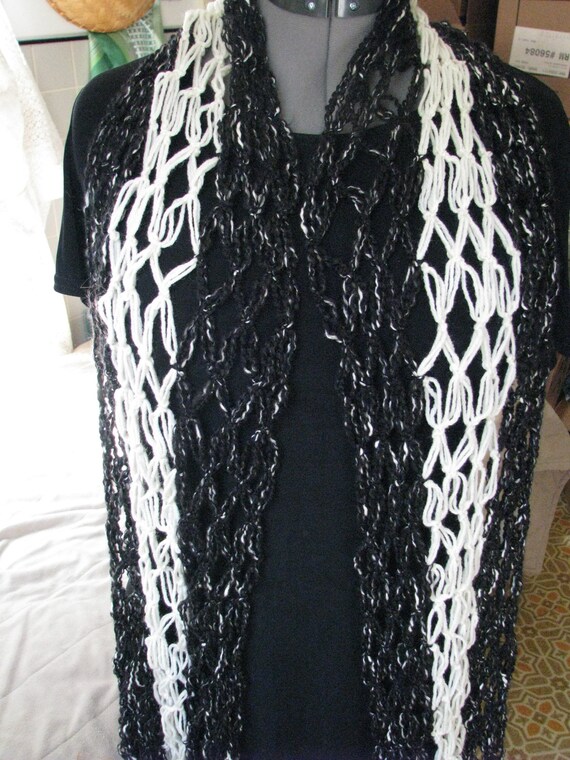
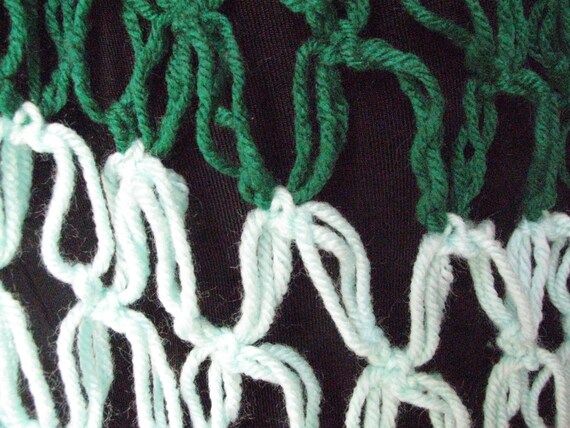
Silky soft Bamboo Rayon/ Acrylic Blend Scarf.
Perfect for style and warmth.
Coral/Salmon
Coordinates with Puse/Tote in my listings!!
11" x 50"
Machine wash gentle. Dry flat.
For more information go to BillyGoatsBuffet on etsy.com.

Monday, September 9, 2013

Ancient Chinese Knotting

The knot. Often the first thing to come to a person's mind when they think of the word knot is the shoe lace that you can't undo, or the mess that your earphones can get in after being in your bag. This might be the case in this place and age, but in ancient China knots often had symbolic and traditional meanings. In Chinese the word “knot” literally meant the joining of two cords and not the general hard place in a string that our word means. Back it the day Chinese knotting reached a point of being an art form unto itself. These small pieces of art could be seen in paintings and statues from ages that we are unable to find the actual knots from. Even though there is evidence of knotting taking place for thousands of years before, the only knots that have survived the ages have been from the late Ching Dynasty and early Republican period. This is because of the erodible nature of the silk cords the traditional knots were made out of. These small art works in their time, could be found in clothing and adorning otherwise mundane items. In a way they were decorations for decorations, and could be found on wind chimes, lanterns, fan tassels, hairpins, and many other things.
True these knots often were just for decoration, but a lot of them also had symbols and meanings behind they shape and making. Some were made for longevity, happiness, and prosperity. Some others were Buddhist treasures, and could express blessings, best wishes and even as a sign of being in love with someone.
As a few examples of these knots with meanings we have the double coin knot, which ancient merchants hung over their tents in the hopes of attracting wealth. Sometimes this knot also meant longevity when used in other places.
Another knot is the sauvastika knot. This one is actually a knot with Buddhist related meanings. Apparently it symbolizes buddha's heart; the power to overcome evil and favor the good.
Then there is the cross knot. This knot simply means the number ten. Finally we have the brocade ball knot which is synonymous with selecting a husband. If a maid is indecisive about who to “tie-the-knot” with she has only to throw this knot in the midst of the people who would have her, and whoever catches it wins.
That is just a few facts about this ancient and often overlooked art form. There is much more about the knots that isn't in this article so if you have found an interest in these beauties just look around the web and see what more you can find out about them that isn't written here.

Tuesday, August 27, 2013

Back to school handcrafted pencil cases

School for the fall semester has begun for many of us and with it a renewed desire to organize that forever messy, and disorganized backpack or bag. We have all probably experienced the time when all we wanted is one pencil but could only find the pencil after digging around the bottom of your bag, and messing everything else up. When this happens it is often time to invest in a new pencil case but all the pencil cases that you find in Staples and Wal-mart have either been made in China that or they all have the same pattern that all you classmates have or both of these problems. When this happens and you are on the hunt for a original pencil case that wasn't mass produced over seas it might be time to start looking at some handmade pencil cases. This is a list of a few handmade and hand sewn cases that were made by people who then try to sell them on etsy.com. These cases have had actual work and love put into their creation and are sure to add more character to your bag's arsenal.


This pencil case made by teniamariecreations is made with the latest popular southwestern Navajo fabric. Beautiful colors and patterns. Fully lined with a quality Black cotton coordinating fabric on the inside.
Here we have a strange yet cheer pencil case with flower patterned skulls on black fabric all over it. This is definitely a one of a kind made by ZoesBagBoutique.

This is an attractive pencil case made by ARTNDECO DESIGN STUDIO using eco conscious fabric. This case is perfect to store pens, pencils, make-up brushes and other supplies. The image on the pencil case was printed with high temperature by high quality printer.

 This is a small pencil case made by  josieandmay - perfect for keeping just a few pens safe in your bag,
Made out of thick, thrifted material, it measures just 16.5 cm x 4.5 cm. It can comfortably fit pens or pencils that are 14cm long, and you can even sneak your USB stick in there too.


Saturday, August 17, 2013

Back to school handcrafted pencils

School is just around the corner for some of us, and for some of the more unlucky(or lucky if you were looking forward to it.) ones have already started. This means for many households that you are currently in the middle of the back-to-school rush of finding all those school items that you had hidden in the corners during break. Bag, pencils, and notebooks to name a few are all in need, and for many these items are either in need of being changed for newer ones, or completely missing and in need of replacement.
Well for those of us in need of the forever dropped, and missing pencil here are some handcrafted, and decorated pencils that can show your originality, and spunk just by being in your back-pack. For some of these handmade pencils it almost seems a shame to sharpen them and actually use them, so if you buy them treasure them and try not to drop them.


Here we have 10 beautiful washi paper pencils. There are fireworks, reds, blues, stripes, golds, sakura blossoms, cranes, greens, fans, purples, pinks and blacks for your choosing. All of these were hand decorated by ColleenAndCohort on etsy.com.

These are some hand decorated gray patterned pencils by caitlynharris on etsy.com. They each have a interesting pattern and are sure to be a good addition to your school bag.

Here we have a set of six colorful paper wrapped pencils by Nicopapergoods on etsy.com. Each pencil is different. This 6-pack is only for $12.00 on etsy.

Here are six colorful and patterned pencils by artsyville on etsy.com. These pencils would be a new and colorful way to start your new school year for only $10 a pack.

Are you a fan of Harry Potter? Or do you just want a wand to match the magic that you work in your homework? Well either way here is a wand-pencil just for you by FriggleFraggle on etsy.com

Here we have a six-pack of pencils with encouraging words for that test or rushed work that you have to do. These were made by CharmAndGumption on etsy.com

Here we have Single Foil Stamped Pencils by HautePapier on etsy.com. These pencils were stamped in gold on black and would make a striking addition to your school day.

Here we have ourselves some rustic twig pencils. For that personal touch you can even have each pencil pyrographed with your choice of name or message. These are all handmade by lovelywoodcompany on etsy.com.

Wednesday, August 14, 2013

Back to school crocheted backpacks


School is coming up fast on many of us and who knows maybe it has already started for some of us. With school being right around the corner now is a good time to start looking for all those school necessities. You know the drill notebooks pencils erasers cloths and so on and so forth. You might have even started thinking about getting rid of that old faded backpack covered in random stains and buying a new one. Maybe you would like to buy one that shows your artistic and crafty character or style. The best way to do this is to buy a bag that was made by someone with these same characteristics. These are a few bags that have been made by people who release their artistic and crafty nature with a crochet hook and yarn. Have a look at these handmade crocheted bags that can put a little more color into your normally gray school days.

This is a hand crocheted colorful and durable
backpack with the measurements of about 12"x11". The straps are about 24" long when closed. Inside the bag there is a 4"x4" cell phone pocket. This was made by Scarfthemup on etsy.com with 100% felted wool.

"This is a crocheted bag in the the perfect size to hold a few books, your water, your lunch, or anything you might need for a day out. It is made of all cotton yarn and fabric liner. The colors include indigo, lavender, and turquoise. It's cheerfully decorated with lavender and turquoise beads and buttons." This was made by BillyGoatsBuffet on etsy.com.

\
Here is one of my newly made drawstring backpack/bag. It was made out of material that I reconstructed/up-cycled into this handy bag. It is about 12x18 and has a crocheted pink white and blue pocket on the front with a button.
Made by me (Dreamcrafter) on etsy.com.

"Perfect Beach Tote. Sand can fall right through. Bottom is reinforced. Yarn is all cotton and washable. The size is very similar to a reusable grocery bag. Decorated with sand dollar charm and flip-flop charm." Made by BillyGoatsBuffet on etsy.com.

Here is one of my newly made drawstring backpack/bag. It was made out of material that I reconstructed/upcycled into this handy bag. It is about 12x18 and has a crocheted pink black and blue pocket on the front with a button.
Made by me (Dreamcrafter) on etsy.com.

This is a very modern bag made from bright yarn and doubled with fabric on the inside for extra strength. The belt is made from leather and can be removed if you wish. This was made by lilitohandmade on etsy.com

"A pretty trackpack. 15.5" across by 15" tall when laid flat. It has some give so it can stretch to fit many items. Handmade in acrylic yarn so it is machine washable when necessary. Straps are black in nylon parachute cord. Perfect for any outing where you want to keep your hands free." This was made by BitsndPieces on etsy.com.

"Going to Farmer’s Market? Beach? Yoga class? or Picnic ?
OKAY, This is absolutely perfect for you.
This is a crochet string bag made with 100%cotton yarn in earthy combination of green color." You can find this bag by thesuperfunklab on etsy.com

Fall handmade items


    Some of us are starting to notice the change in the air, and yes it does seem like our summer time might be soon drawing to a close. In fact, according to the official date it starts in roughly just a month from now on Sunday, September 22. It might be a head of time but now is  a nice time to start looking at all those wonderful handmade arts and crafts that you've been avoiding eye contact with while you were still able to wear a swimsuit without freezing. Have a look at these handcrafted items from some etsy.com crafters who are also revving up for the new season.
   If you would like to see my article about this on examiner.com click here.


Here we have a hand-knitted cowl/scarf by sewinthefaith. This cowl/scarf was made in bright blues and violet colors that can spiff up any outfit just by being there. Wear it wrapped around your neck as a scarf or pull it over your head to keep your ears warm.
  This is a beautiful crocheted poncho made by Dreamcrafter who makes and sells crocheted and felted items that she sells on etsy.com. This poncho here only costs $15 and would spice up any occasion.

Here we have a hooded poncho by WhatsOliviaWearing made in the very colors of fall. This would look cute on both children and adult for those chilly fall mornings. This poncho is for sale for $82 on etsy.com.
"This is a beautiful pair of hand made glass beaded earrings. These are made by weaving seed beads, bugle beads and 4mm rounds together in this classy southwestern style with bronze, beige, teal and brick red colors. They are very light weight for comfortable wear." This is by  carosell  on etsy.com.


This cup by ElenaLukatskyArt woud be a cute addition to any fall or winter day that you find yourself sitting out indoors. Would be a hand-warming jem for the day when you just want a cup of tea near the window while watching the leaves fall outside. You can find this item for sale on etsy.com.

This here is a crocheted made by ripnrollrugs rag-rug made in the muted yet bright colors of fall leaves. While this rug might be too beautiful to actually wipe muddy shoes and boots off on it would make a wonderful bedroom or living-room rug to add to your living space.

These beautiful knit leg warmers were made by Madebyfate on etsy.com and would be wonderful for that winter day when the only socks you can find are ankle-lets socks. These make a stylish accent for any outfit that also help against the weather. You can buy them for $50 from etsy.com.

Tuesday, August 13, 2013

Labor Day patriotic arts and crafts

Labor day by the Wikipedia definition is a holiday that celebrates the work and social contributions of workers and laborers in general. For many of us though we know of it as the day that we call the family over for a potluck and perhaps a picnic, if the weather permits it. For some others of us it might even have a patriotic feeling to it. Whether you love this holiday in the form of patriotism or in the family loving mood, we all know the feeling that this holiday gives us as being one that brings out the old fashioned American spirit of homemade happiness.
This homemade and handmade spirit of happiness can be found everywhere, but nowhere can you feel it as strong as in the arts and crafter's that you can find in flea-markets and craft shows. Even if you are unable to make it to one of these fun events you can still find these things online where the crafter's put their handcrafted items.
Here are a few of these homemade items that you can find online for those of us unable to leave
 house and home for the shows.
  If you would like to see my article about this on examiner.com click here.
"Here is a lovely pair of handmade glass beaded earrings. These are made by weaving seed beads together in this elegant presentation of American patriotic colors of red, white and blue. They are very light weight for comfortable wear. Pierced earrings come with a clear plastic backing highly effective in preventing loss of earrings." This is from Carosell's listing on etsy.com. If you wished to have a closer look at these earrings you can find them on etsy.com.

"Proudly display this patriotic wreath on Memorial Day, July 4th, Labor Day, Veteran's Day, Election Day and many other days that it is awesome to be an American!
18" inch wreath, measures about 19" completed." From HugsNKissesStudio on etsy.com who makes colorful wreaths for any holiday and season.

"Uncle Sam is ready for your lawn goose to spruce up your Holiday decor. Uncle Sam is made from felt, in a dark Navy color or Red, has matching Top Hat, with cotton vest, that has 3 buttons added for looks, and carries a flag in one of his wings(arms)." This is from ripnrollrugs on etsy.com who makes all sorts of funny and cute out fits for you resident lawn goose.

"This labor day invitation features a vintage inspired background with white stars and red stripes with a vintage font. Perfect for events other than labor day." This is by ShirtsbySarah on etsy.com who has digital designs for any event or holiday that you could think of in her etsy store.

And now for a slightly younger and more frayed look at patriotism and the Labor Day holiday by WhatsOliviaWearing on etsy.com. WhatsOliviaWearing's "store mission is to create garments that are one of a kind and promote an earth friendly approach to style."

"This is a brightly colored red white and blue framed four patch table runner. Great for decorating your table for the many occasions within the year. It measures 42" x 11" and is machine quilted." This is made by Sewinthefaith who works hard making beautiful quilted table runners for every household.

Monday, August 12, 2013

Decorating your plain bag

For sale here on Etsy.com
Do you have a bag that just looks so empty on the front? Or perhaps you have a nice bag but you somehow got a bleach spot or stain on the front. Well don't throw that bag to Goodwill quite yet. If you have time try to fix it up with a new look. It might surprise you how much you can do with just a little ingenuity and a bag.
It is especially easy for crocheters to add to a bag. Try crocheting a granny square, a circle or really any other shape that you would like to throw out there. Try crocheting it in bright and sometimes contrasting colors that attract the eye.
Once you have a piece that you think would look nice on your bag either as a pocket, or as a patch take some pin-needles and pin it onto the bag to see how it will look, and if it will fit. If it looks about right go a head and start sewing the crocheting on with a thread and needle, stitch for stitch. If you were thinking of just adding it as decoration sew all the way around the crocheting and then tie it off. If you were thinking about making the crocheting into an extra pocket for your bag, only sew around the sides and the bottom of the crocheting. Leave the top open and then sew a button on to the bag to help keep the new pocket closed and neat looking.
If you weren't so much of a crocheter but more of a sewer then a patch of colorful fabric will do the same trick. Go a head and do the same thing you would have done for a piece of crocheting. One fun thing you can try if you do this with fabric is that if you want, you can try sewing a pattern around that edges of the new pocket or patch. It can be something simple like a zig-zag or if your doing it by hand an X-stitch. You can also try something fancy like flowers if you have the skills and know-how for that sort of thing.
There are many other ways to fancy up a old and plain bag then just this. All you need is a bit of imagination and if that’s lacking(as it sometimes is.) there is always the wide open internet for inspiration. You would be surprised at how many different ways there are to put more spark into the bland.
 If you would like to see my article about this on examiner.com click here. Sometimes I put a video on examiner.com that helps with my instructions so if this doesn't make sense jump over to examiner to see the video and hopefully that will help you.

Sunday, August 11, 2013

Learning to crochet, changing colors.


While working on a crocheting project you might find you would like to change the colors in the middle of the work, either to add a strip of color or a pattern. As an example lets say you are making something with the single crochet stitch and in the middle of the row you want to change your yarn from red to blue.
Can also be found here in etsy.
  • Finish the single crochet stitch of red so that you only have one loop on your hook.
  • Let go of the red yarn that you were working on and pick up that new blue yarn that you want to change to.
  • Poke your hook through the next stitch like you would have normally, but instead of grabbing the old red yarn, grab the new blue yarn and pull it through the stitch as your new loop.
  • You can go a head an cut the old yarn off. Make sure to leave a tail. You will want to weave this tail into the rest of the red crocheting so that it can't be seen
  • Now that you have the new color on the loop go a head and start crocheting with the new color as if nothing had happened. Be careful to also leave a tail for the new blue color for you to weave in otherwise your work will start to undo itself.
This weaving in of the tails is also something that you will need to know when it comes to finishing a project. To weave in a tail you poke the hook through a stitch near where the tail comes out, and pull the tail of yarn through it then you just continue sewing the extra piece of yarn through the other stitches. It would be better for you if you did this in the yarn that is the same color as the tail so that it doesn't look like a random strip of color running through your work. When sewing/weaving the tail in it would be better if you sewed it through the top of the stitches of the row that it just can from because its more noticeable when you jump rows while sewing/weaving.

If you would like to see my article about this on examiner.com click here. Sometimes I put a video on examiner.com that helps with my instructions so if this doesn't make sense jump over to examiner to see the video and hopefully that will help you.

Learning to crochet, the single crochet.

Can be found here in etsy.com

The next level up from the slip stitch in crocheting is the single crochet. The abbreviation for the single crochet when reading a pattern is sc, but we won't be messing with that this time. Once you start doing patterns you will need to know the abbreviation to be able to understand the pattern. A good thing to keep handy when doing a pattern is a key/index of all the common stitches, because even if you learn all the stitches knowing which abbreviation goes with which stitch can be hard sometimes.
When using the single crochet to make something you will usually get a thicker and stiffer piece of fabric. It is a really good stitch for making a washcloth or table-runner out of, but it isn't usually so great for making a scarf or blanket, since you would usually want something softer for those projects. It is also the stitch you would use for if you wanted to crochet a basket or stiff bag.
The things you will need to do this stitch are one crochet hook, yarn, time, and a pair of hands.
  • To start the single crochet you are going to need a base of either chains or a row of some other crochet stitch. If you don't have any of that yet go a head and try chaining ten chains to get us started.
  • Now that you have ten chains chain one more time. So now you have eleven chains.
  • Poke your hook through the second chain from the hook and grab the yarn.
  • Pull the yarn through the chain. Now you should have two loops on your chain. One of them coming from the chain, and the other from being pulled through the chain.
  • Now that your hook has these two loops on it grab the yarn one more time with the hook, and pull it through both loops on the hook leaving only the new loop that you just grabbed on the hook.
  • Congratulations you just did a single crochet stitch. Repeat what you did all the way down the chain and you will have finished your first single crochet row. To do the next row chain 1, turn the work and start doing the same thing all over again, only this time on the top of the single crochet not the chains.
As a small pointer for your future adventures in crocheting when doing crochet you can sometimes start to get confused about how many times you should be chaining when you reach the end of a row. This holds especially true for when you are working without a pattern. When using a pattern you are usually told how many chains to chain at each end of a row unless the pattern is faulty.
To say it very simply slip stitches you don't chain any from row to row. For single crochet you chain one, half double crochet chain 2, double crochet chain 3, triple crochet chain 4, double triple crochet chain 5 and so on.
Another way for you to think of it is that you chain one chain for every-time that you pull yarn through two other loops, and then add one more. This pointer may not always prove right but then again there is no real rule of thumb when doing crochet.

If you would like to see my article about this on examiner.com click here. Sometimes I put a video on examiner.com that helps with my instructions so if this doesn't make sense jump over to examiner to see the video and hopefully that will help you.

Saturday, August 10, 2013

Learning to crochet step three the slip stitch

Etsy.com

Now that you have gotten the hang of pulling the yarn through the loop to make a chain you are probably looking for the next step. Well here it is. The next level up in crocheting would be the slip stitch. Don't get it confused with the slip knot that you started with. This stitch is used mostly for connecting projects, or finishing a row while making a granny square, or working in the round.
  • Before we get started with this stitch you are going to need to have a chain. Go a head and chain ten to get us started.
  • Now that you have your chain base take your hook and poke it through the second chain from the hook. Some people have different parts of the chain that they like to use, but for the sake of just doing the slip stitch it probably doesn't matter for you right now. Just make sure you're consistent.
  • Grab the yarn from the other side and pull it through the chain, and then the loop you already had on your hook.
  • Now go a head and repeat all the way down the chain and you will have made yourself your first row of slip stitches.
Admittedly it won't look like you've done much once you've finished but that is how you do the slip stitch. This stitch is a necessity for many patterns so make sure you know about it when you get started with a project. You can also use the slip stitch to sneak your way around a project if needed, but that's probably a bit advanced for beginners.

If you would like to see my article about this on examiner.com click here. Sometimes I put a video on examiner.com that helps with my instructions so if this doesn't make sense jump over to examiner to see the video and hopefully that will help you.

Friday, August 9, 2013

Learning to crochet step two, chaining

Shawl can be found here in etsy.
Once you have figured out how to make a slip knot without making a tangled mess the next step on the road towards crocheting is the chain. This stitch is the ground-floor for every crochet pattern that you could ever start. Without it there would be no such thing as crochet.
  • To start you will need one crochet hook, yarn, and a pair of hands. With the yarn and the pair of hands, make yourself a slip knot. Put the slip knot on the crochet hook and tighten it a bit. You don't want it too tight otherwise you won't be able to work with it. Remember you can always loosen it by pulling on the tail of the yarn.
  • Next hold the crochet hook with the slip knot in your dominant hand, and with your other hand wrap the yarn around your fingers for tension, and pinch the knot with your middle finger and thumb. There are actually a lot of different ways that the hook and yarn can be held, but try holding it like this for now unless you find a better way.
  • Wrap the hook around the yarn and pull the yarn through the slip knot on the hook. Pull on the yarn to tighten things a bit if its needed.
  • Now just repeat and you should soon have a chain. Remember to keep the slip knot and the growing chain pinched so that you can tighten it as you work.
That is how you do that chain. True its easier said or written then done, but once you get the feel for how the steps are suppose to flow you won't even think of them as steps anymore and things will start going faster.

 If you would like to see my article about this on examiner.com click here. Sometimes I put a video on examiner.com that helps with my instructions so if this doesn't make sense jump over to examiner to see the video and hopefully that will help you.

Thursday, August 8, 2013

Simple Way to Make a Crocheted Poncho

Poncho and photo by Madebyfate. To find more by her click on link to go to her etsy store.
Are you tired of crocheting the same old scarfs and blankets? Would you like to try a new looking pattern but haven't yet mastered the fancier stitches? Well here is a pattern for a simple yet elegant looking poncho that you don't need any fancy stitches for. This pattern is just about the same amount of work to finish as a baby blanket, but if you use looser and longer stitches it can go a lot faster.

    The first part is to chose a stitch that you would like to make the poncho out of. It would be suggested that you use a larger stitch like the triple or the double triple crochet stitch. This way your poncho won't be stiff and the work will go faster. You can also chose a fancier stitch if you wish. Just make sure that the beginning and the ending of the stitch that you use is straight. (Be sure not to use a zig-zag or ripple stitch unless you know a way to end it straight.)
    Now measure how far down your arms you want the poncho to go. Be careful not to chew off more then you can handle. You don't want to get stuck on a monster project that you don't have the concentration to finish.
    Once you have how long you want it to be, chain a chain as long as the measurement. Turn, and start crocheting down the chain with the stitch of your choice.
    It might make things more interesting if you changed the colors now and then because you have a lot of crocheting to do. The point of this is to get a long rectangle of your work.
    When you have a rectangle long enough you should be able to fold the crocheting so that the end of the side that your working on can meet with the “side” of the other end. Remember we are not making a circle of crocheting. When folded the poncho should have a corner where the front of the poncho would be.
    Check to see how big the poncho would be every now and then by folding it this way and when you think that it has grown big enough for the person who will be wearing it finish it off.
    Now fold it so that the finished end meets with the “side” of the beginning. Start slip-stitching it together. Finish it off again. Tuck in all yarn ends that are hanging out and you are done!

If you would like to see my article about this on examiner.com click here. Sometimes I put a video on examiner.com that helps with my instructions so if this doesn't make sense jump over to examiner to see the video and hopefully that will help you.